Jetpack Compose: ViewModels
If you have developed Android apps recently, chances are you are familiar with Jetpack's ViewModel and the unidirectional data flow.
Quick recap, in case you are not familiar with the unidirectional data flow term. You keep the permanent state of the screen in your ViewModel (that is retained with configuration changes, e.g. screen rotations) and you expose that state with LiveData that your view "observes" and reacts to. When you want to make a change to your screen, you notify the view model that does its business logic and emits a new value to the observing view. Long story short, data are moving only to a single direction each time, thus unidirectional.
But how does this paradigm fits into this new UI world™? In the old world, the imperative UI world, when observing a LiveData you would explicitly instruct the view to change the necessary value (e.g. myAwesomeLabel.text = newValue). How do you accomplish this since you cannot instruct directly the UI to change?
Meet State
It turns out it's even easier than before. In the declarative world, when you assign a value to a UI element, the UI gets redrawn automatically when that value changes.
Jetpack Compose's State<T> is responsible for this automatic "redraw" (in Compose it's called "recomposition"). So all you need to do is convert your LiveData to a State. Unsurprisingly, this is easy to do.
Example
A simple example is way better than a bunch of words. Before we start, except for the obvious dependencies for ViewModel and Jetpack Compose, you will need another for converting LiveData to State:
dependencies {
    [...]
    implementation "androidx.compose.runtime:runtime-livedata:1.0.0-alpha07"
}
As always, check for the latest version before copy-pasting.
ViewModel
class MainViewModel : ViewModel() {

    val counterLiveDate: LiveData<Int>
        get() = counter

    private val counter = MutableLiveData<Int>()
    private var count = 0

    fun increaseCounter() {
        counter.value = ++count
    }
}
A simple ViewModel that holds some state, in this case, a simple Int called count that is exposed to the view using a LiveData<Int>.
View

class MainActivity : AppCompatActivity() {
    override fun onCreate(savedInstanceState: Bundle?) {
        super.onCreate(savedInstanceState)
        setContent {
            // 1.
            ScreenDemo()
        }
    }
}

@Composable
fun ScreenDemo(model: MainViewModel = viewModel()) { // 2.
    val count by model.counterLiveData.observeAsState(0) // 3.
    Demo("This is $count") { model.increaseCounter() }
}

// 4.
@Composable
fun Demo(text: String, onClick: () -> Unit = {}) {
    Column {
        BasicText(text)
        Button(
            onClick = onClick,
        ) {
            BasicText(text = "Add 1")
        }
    }
}

// 5.
@Preview
@Composable
fun PreviewDemo() {
    Demo("Preview")
}- You might be wondering where is the
ViewModelsince we are not getting an instance in theActivity. There's seems to be an easier way in Compose (see next). - This
viewModel()default value will return an existingViewModelor will create a new one in the scope that is called (in this case of theActivity). No need to hold a separate instance of theViewModelin theActivity. - This is where you convert the
LiveData<Int>into anIntthat you can use directly into Compose elements. Behind the scenes, there's a Compose'sState<Int>that is responsible for "recomposing" the view every time there's a new value. The0is the initial state. - This "stateless" Composable knows only how to draw something that is given (1st parameter,
text) and notify us when there's a user interaction (2nd parameter,onClick). - Splitting the Composables into "stateless" (
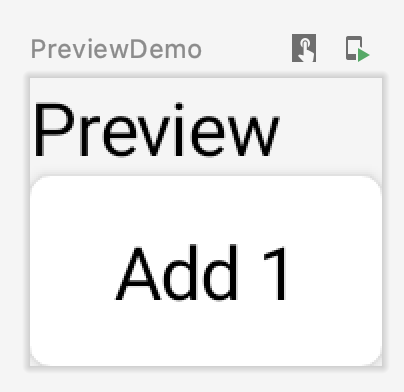
Demo) and "stateful" (ScreenDemo), allow us to preview the stateless Composable easily without rebuilding the app each time by annotating with@Previewand passing some sample values.
Hopefully, you got a grasp on how Jetpack ViewModel can be used in Jetpack Compose. For more, check out the excellent doc and codelab. Happy coding!
Check out more in this Jetpack Compose exploratory series:


